When your dog is injured and bleeding, staying calm and knowing what to do can make all the difference. By acting quickly and efficiently, you can stabilize your furry friend and prevent the situation from escalating until you can get them professional care. This guide provides practical steps you can follow to stop bleeding in an emergency, ensuring your dog's safety and well-being.
Pet Care MiniMed Pack

$19.95
$23.94
Features: Provide your furry friends with the best care! Includes first aid supplies specifically designed for pets, ensuring their safety and well-being. Don't let an accident or injury hold your pet back from being their happiest and healthiest self. Trusted… read more
Why Knowing First Aid for Dogs Is Essential
Dogs are naturally curious and sometimes reckless, which makes injuries—like cuts, scrapes, or more severe wounds—a common occurrence. Whether you're at home, on a hike, or even just at the park, being prepared to handle bleeding can significantly impact your dog's recovery. Learning a few basic techniques can help you make quick decisions when seconds count.
Now, let's explore the step-by-step process of stopping bleeding in an emergency.
Step 1: Assess the Situation and Stay Calm
The first thing to do is assess the severity of your dog's wound and stay composed. Panicking won’t help your dog and may cause them additional stress. Take a deep breath and follow these steps:
- Examine the wound to establish how severe the bleeding is. Look for the location, depth, and size of the injury.
- Control your dog’s movement to prevent further injury. If they're distressed or resisting, calmly use reassuring tones and try to restrain them gently.
If the bleeding is excessive, such as with arterial bleeding (characterized by spurting blood), you’ll need to act very quickly and move to the next step immediately.
Step 2: Apply Pressure to Stop Bleeding
Stopping the bleeding as soon as possible is crucial. Here's how to do it effectively:
- Grab a clean cloth, gauze, or towel. If you're outdoors and don't have medical supplies, use whatever is clean and on hand, such as a T-shirt or bandana.
- Press firmly on the wound. Apply steady pressure directly to the injured area. This helps slow blood flow and encourages clotting.
- Elevate the wound. If the wound is on a leg or paw, gently lift it above your dog’s heart level. This reduces blood flow to the area, further helping to control bleeding.
Hold the pressure for at least 5-10 minutes without peeking. Removing the cloth too soon can disrupt the clotting process and cause the bleeding to start again.
Step 3: Clean the Wound (If Bleeding Is Minor)
Once the bleeding is under control and your dog seems more stable, it’s time to clean the area to prevent infections. Follow these steps if the wound is small and has stopped bleeding:
- Use lukewarm water to rinse the wound gently, removing dirt or debris.
- Apply an antiseptic solution (such as chlorhexidine) to disinfect it. Avoid alcohol or hydrogen peroxide as these can damage the tissue.
- Pat the area dry with a clean cloth or gauze.
For deeper wounds or those that won’t stop bleeding, skip this step and focus on keeping the wound covered until you can seek professional veterinary care.
Step 4: Apply a Temporary Bandage
Proper bandaging plays a vital role in protecting the wound and controlling further bleeding. Here’s how to do it:
Materials You’ll Need
- Sterile gauze pads
- Self-adhesive wrap (or medical tape)
- Clean cloth if no gauze is available
How to Bandage the Wound
- Place a sterile gauze pad over the wound to absorb blood and prevent contamination.
- Wrap the area snugly with adhesive wrap or medical tape, but be careful not to make it too tight. Cutting off circulation can worsen the situation. You should be able to slip two fingers under the bandage.
- Secure the bandage in place. If your dog tries to remove it, distract them with treats or use an Elizabethan collar (cone) to prevent access.
Regularly check the bandage to ensure it's not slipping and replace it if it becomes too soiled.
Step 5: Monitor for Signs of Shock
Severe blood loss can lead to shock, which is life-threatening. It’s important to look for the following signs in your dog:
- Pale gums
- Rapid breathing or panting
- Low body temperature (your dog may feel cold to the touch)
- Weakness or lethargy
If you notice any of these symptoms, wrap your dog in a blanket to keep them warm and seek immediate veterinary attention.
Step 6: Transport Your Dog to the Veterinarian
While first aid measures can stabilize your dog, proper evaluation and treatment by a veterinarian are essential. Even minor wounds can become infected if not treated correctly. Call your vet or an emergency animal hospital while you’re en route to avoid delays.
When transporting your dog:
- Keep them as calm and still as possible.
- Avoid removing the bandage unless instructed otherwise by the vet.
- Have someone accompany you, if possible, to help comfort or restrain your dog.
Tips for Preventing Future Emergencies
While accidents can happen, there are steps you can take to reduce the likelihood of injuries:
- Dog-proof your home by removing sharp objects or dangerous items from their reach.
- Supervise outdoor activities, especially in areas with rough terrain or broken glass.
- Train your dog to respond to commands like “stop” or “heel” to avoid risky situations.
- Keep a first aid kit specifically for pets in your home and car, including gauze, antiseptic, and adhesive tape.
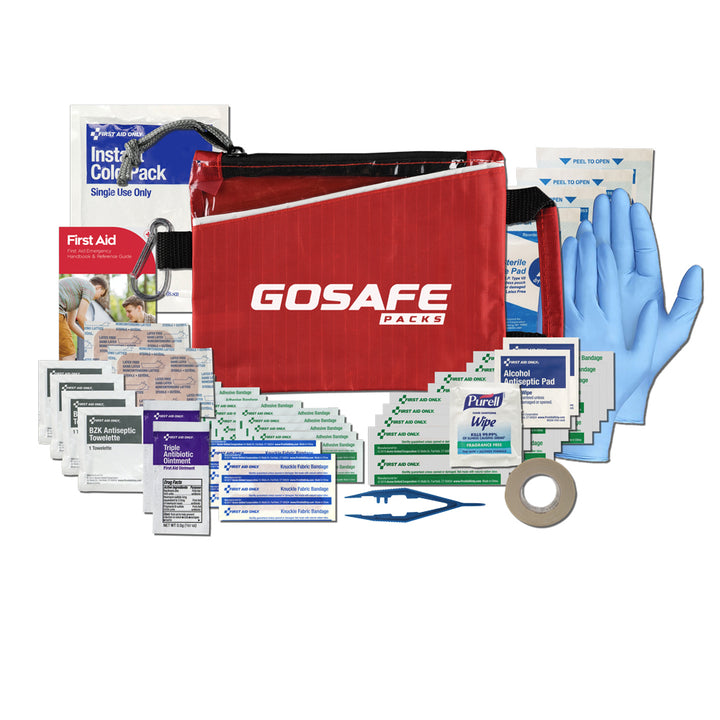
Build Your First Aid Kit for Dogs
A well-stocked pet first aid kit can be a lifesaver in emergencies. Essential items include:
- Sterile gauze pads and rolls
- Adhesive bandages or vet wrap
- Antiseptic wipes or solutions
- Tweezers (for removing debris)
- Scissors
- Non-latex gloves
- Contact information for your vet and the nearest emergency animal clinic
Consider adding a dog first aid guidebook for quick reference during high-stress situations.
First Aid QuickMed Pack
$24.95
$29.94
Features: Ripstop nylon bag Handy front pocket, durable carabiner and a handle An essential part of any household or workplace. Designed to efficiently treat burns and injuries. Keep your safety a top priority with this comprehensive pack. … read more
Your Calm Action Can Save Lives
Knowing how to stop your dog's bleeding in an emergency is an invaluable skill that every pet owner should have. Your quick actions—assessing the situation, applying pressure, bandaging, and seeking professional help—can make all the difference in your dog’s recovery.
A little preparation goes a long way. Assemble a first aid kit today and take a basic pet first aid course if you haven’t already. You’ll never regret being prepared when your furry friend needs you the most.